1
of 6


NEW IMAGE POOL INTERIORS
NEW IMAGE POOL INTERIORS
When it comes to applying a fresh finish onto an existing pool or spa, the new material will only be as successful as what’s underneath.
The new surface must adhere properly to the old, and the old material must be suitable to receive the new.
With many of today’s products, some are finding a bond coat is more necessary. “Years ago we used to do a standard plaster finish [and] roughen the surface enough to get a decent bond on it,” says Kevin Ford, president of Pool Builders Inc. in Davie, Fla. “But with the newer finishes it is much harder to get a rough enough finish in order to achieve a good bond with the new surface.”
To that end, there are several ways to prepare an existing vessel for a new finish. Sometimes, the cheapest and easiest method is to apply a bond coat. This cementitious material is meant to form a physical and chemical bond with the new coat of finish so that it won’t go anywhere once applied.
Here, veterans discuss the best way to apply bond coats.
While applying a bond coat is one of the easiest ways to prepare the surface, it isn’t always the right way.
First of all, the old plaster must be in good enough shape to support the new coat. If large amounts of delamination are present, it’s an indication that the coat is no longer sound and may not support a new finish. In these cases, if the old material isn’t removed, it may continue to come off and take the new with it.
Problems can show up in the process of cleaning the pool surface. “Say you do an acid wash or you’re power washing it, and it just starts crumbling — at that point it’s not a good candidate,” says Greg Garrett, owner of Applied Materials Technology in Chandler, Ariz.
The bond coat may be the best way to go if the pool has already undergone one or two chip-outs, which often take a little bit of shotcrete or gunite with it.
If the original finish is in good shape and the contractor decides to apply a bond coat, the surface must be properly roughened up and prepared. This way, the bond coat will fuse onto the old surface.
This stage is where errors commonly occur. “I’ve seen bond failures where the new plaster adhered to the bond coat material itself, but the bonding material came away from the substrate, and when you look at the substrate it was as smooth as can be,” Garrett says.
In preparing the surface, professionals should check for any loose patches of plaster. A bond coat is still feasible if there are only a few, but they need to be removed.
“If you have any soft residual materials left, that could eventually peel up and take the new bond coat with it,” says Alan Smith, owner of Alan Smith Pool Plastering in Orange, Calif.
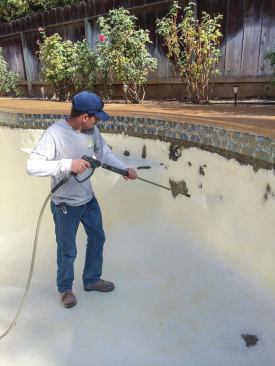
Next, the entire surface must be cleaned and roughed up to receive the bond coat. Some plasterers do this by performing an acid wash. This not only removes staining, but also strips away part of the old surface cream from the original finish, thus roughening the surface.
Others prefer to sand blast the old finish. “The key objective is to have any soft, hollow or scaled surfaces removed so you have a hard, durable surface to stick to,” Smith says. “We use sandblasting because we think that is the most aggressive way of removing the plaster.”
His crews use a 365-cfm (cubic feet per minute) compressor and a coarse, hard sand, say 12- to 16-grit. “It’s a sharp, angular sand that cuts really well,” Smith says.
While the crews do this, pieces of the old material may peel back. That needs to be removed down to secure material.
Next, the surface should be cleaned before the bond coat can be applied. “It has to be a super-clean surface, otherwise [the bond coat] won’t stick properly,” Smith says. “Even if you sand blast it, you have to make sure all the sand, grit and any soft materials are completely off. If you acid wash it, all the acid has to be neutralized.”
When choosing a bond coat, make sure it’s suitable for pools and spas. Some products may perform just fine in showers, bathtubs and kitchens, but that doesn’t mean they can withstand the chemical conditions found in a pool or spa.
“You should ask the question: Is this product meant to be in a continuously immersed, chemically treated environment?” Garret says. “The answer had better be, ‘Absolutely.’”
Also, do not make your own bond coat. While it has worked for some applicators, they generally have extensive knowledge of the chemistry of the various components. For most, this will result in failure (see sidebar).
When mixing the bond coat, do not exceed the recommended amount of water or it will become weaker and won’t form the peaks needed for a rough texture. “Some people will … dilute it down in order to stretch it and make it work, but you can’t do things like that,” Ford says.
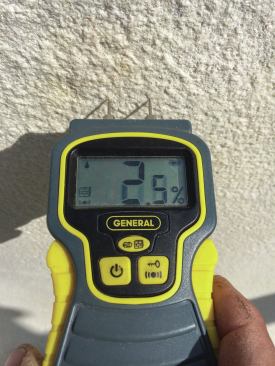
The bond coat also is affected by weather. On hot days, it must be applied quickly — experts recommend that the membrane is completed before the temperature of the air or substrate reaches 90 degrees. Bond coats also should not be applied when fog or rain are imminent since cold, damp weather will delay setting times and may even compromise its effectiveness. “On many of the products, polymers usually don’t cross link or coalesce under 50 degrees,” Garrett says. “It won’t coalesce, harden and serve a viable function. So it’s the Goldilocks story: You never put it down when it’s too cold, and you should never put it down when it’s too hot.”
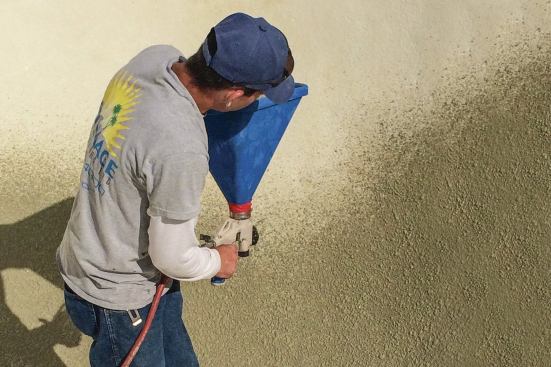
The bond coat material can be brushed, rolled or sprayed, with each method requiring a different technique.
Brushing is probably the least expensive: Not only are brushes inexpensive, but this method also doesn’t waste material. When using this technique, applicators should essentially throw the bond coat on by snapping the brush toward the surface, forming small peaks.
Rolling is economical as well — again, there is no large upfront equipment investment. The bond coat is applied with thick-nap paint rollers, which help create a peaked texture. This method involves easier clean-up and allows for plenty of control in application, Ford says, however, it can use up more of the material.
Spraying is pricier because of the spray gun, but it’s also faster, can use less material and, when the adjustments are right, will automatically leave a highly textured, stucco-like surface. When spraying the material, professionals should hold the gun perpendicular to the surface. “If it comes at an angle, sometimes [the material] bounces off, and doesn’t stick properly,” Smith says.
In addition, the compressor needs to be set to release the right amount of air. Too much will cause a spray of particles that aren’t large enough; too little will create a material that doesn’t peak up well. “If it’s just right, it has a nice, fine texture to it,” Smith says. The correct setting depends on factors such as the size of the gun and its orifice, so crews must take the time to make adjustments until the consistency is right.
If these elements aren’t right, the material will begin to behave like shotcrete — namely, pieces resembling rebound will bounce off the walls, and the remaining material may not be strong enough.
Regardless of the method used, the basic goals are the same. The surface should be somewhat rough to create both a physical and chemical bond. It also should be uniform and level throughout the vessel. This not only allows the material to set consistently to attain an even performance, but also helps form an even, level foundation for the new finish material.
Crews may need to combine methods to work around different elements. For instance, simple fittings such as light niches can be covered with tape so that the applicators can simply spray over them. However, some features, such as rockwork that dips into the pool, may be too complicated to tape. Here, Smith’s team uses a combination of spraying and rolling. “We’ll roll it maybe a foot down [from the rockwork] and then spray,” Smith explains. This allows them greater control when they work near the rocks.
Once the coat is completely applied, it should be left for at least a day, but no more than three. If the coat sits too long, it won’t be able to form a chemical bond with the finish material.
No recommended contents to display.