Use this guide when working with backwash valves on sand and DE filters
1 MIN READ
Few things can frustrate a technician more than getting ready to conduct routine pool or spa service only to encounter a broken, leaky or jammed backwash valve. When operating properly, the backwash valve keeps water flowing through the filter in the right direction. However, O-rings and seals inside the valve body wear out, leading to a drip, or even a small stream of water running out of the backwash line.
A backwash valve leak can mean a dirty pool, or much worse. Water loss that drains the pool can, over time, run the pump dry, risking burned-up seals and other costly repairs. And if it is an open backwash line, when the pump turns off for the day, water can drain out of the filter, draw air into the line and reverse the flow direction, leading water to run back into the pool and bring dirt and even DE with it.
Fortunately, fixing a backwash valve isn’t all that technical. A variety of valves have been designed for backwash functions, but the repair task is made somewhat easier by the fact that there are only three basic types of backwash valves: rotor, push-pull and multiport.
Before you start
For guidance in backwash valve repair, start with this step-by-step pictorial. Before beginning, take some precautionary steps:
On multifilter installations, isolate the filter in question using other valves available in the system. Open the air-relief valve while the pump is running to release the pressure in the filter tank and eliminate the potential for serious injury.
Buy only correct replacement parts. For more information about the valve, consult manufacturer guides or a representative.
1
of 5
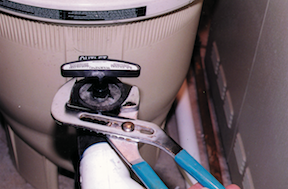
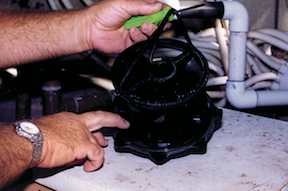
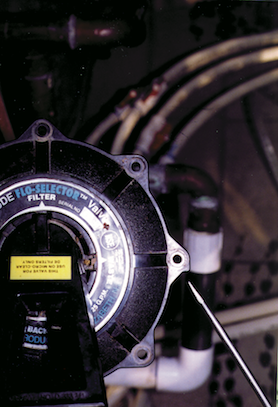
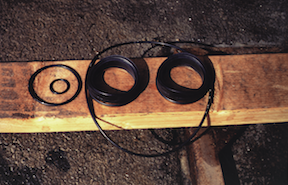
1. The most common type of backwash valves in use — push-pull …
1. The most common type of backwash valves in use — push-pull valves — have been around for years. They can be found on sand and DE filters, and a number of manufacturers offer them.For most DE models, the valve is down for filter and up for backwash. On most sand varieties, it’s the opposite: up for filter and down for backwash. Most manufacturers have changed their push-pull valves from brass to plastic (PVC and ABS) — O-rings for an old brass valve may not fit the new plastic valves — but the basic repair procedures for these valves has stayed about the same.The stem of the push-pull valve has four O-rings on it. The two piston O-rings keep the water flowing in the right direction. The cap O-ring and stem O-ring keep water from leaking out from under the cap and around the stem. All four should be replaced when rebuilding. As the valve gets old, it can be difficult to remove the cap by hand. When this happens, a strap wrench or tongue-and-groove pliers, gently applied, may be the only way to open the valve.
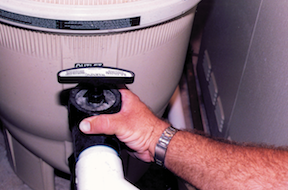
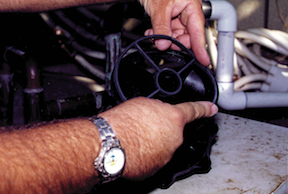
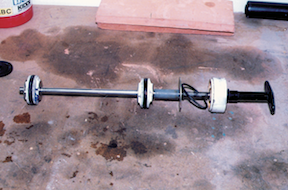
2. Pull the stem out of the valve body.
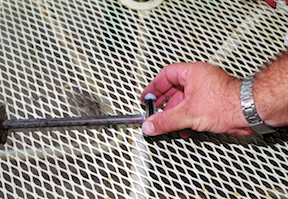
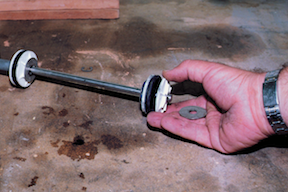
3. Use a small-blade screwdriver or an O-ring pick to remove the…
3. Use a small-blade screwdriver or an O-ring pick to remove the O-rings from the stem. If the stem is metal, use a small piece of sanding cloth to clean the groove before rolling a new O-ring into place. Clean the top of the stem to help it slide more easily.
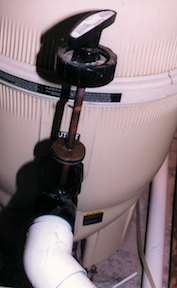
4. Apply a layer of lube to the O-rings and put the stem back in…
4. Apply a layer of lube to the O-rings and put the stem back into the backwash body.
…
5. When reassembling the valve, always follow the manufacturer’s instructions and “hand tighten only.”
1
of 6
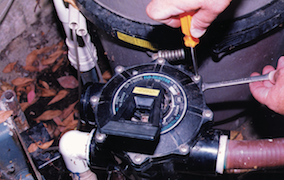
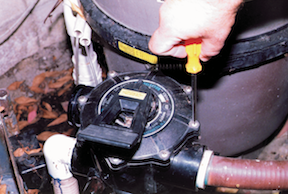
1. Use a screwdriver to remove the machine screws around the cov…
1. Use a screwdriver to remove the machine screws around the cover of the backwash valve. There is a nut (and sometimes a washer) underneath. Be careful not to drop them — they’re easily lost.
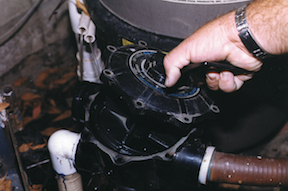
2. Remove the cover of the multiport valve.
3. Use a small blade screwdriver or O-ring pick to remove the va…
3. Use a small blade screwdriver or O-ring pick to remove the valve seat gasket. There also will be an O-ring under the cover. To ensure against leaks, remove and replace this O-ring. Note: When the valve seal gasket is on the key assembly or diverter, the two often must be purchased together (the gasket is installed on the key in the plant).
4. Clean debris from the grooves with a screwdriver, run beads o…
4. Clean debris from the grooves with a screwdriver, run beads of adhesive into the grooves and then set the new gasket in place. Apply a layer of lube on the gasket and the O-ring before placing them back in the valve body.
5. The valve cover and body have alignment indicators (a square …
5. The valve cover and body have alignment indicators (a square edge indicated by the screwdriver) to ensure that the cover is replaced in the proper position.
6. Tighten the valve cover back down with a screwdriver on the t…
6. Tighten the valve cover back down with a screwdriver on the top and an open-end wrench (usually 7/16 inch) underneath to hold the nut. If you use a cordless screwdriver, use slow speed or a low torque setting so you don’t overtighten and damage the valve cover.
1
of 2
1. Even though no longer manufactured, old-style valves can stil…
1. Even though no longer manufactured, old-style valves can still be found on many swimming pools. They work basically the same way, but have more parts and use gaskets or washers instead of today’s O-rings.
2. Older backwash valve stems were not a single molded part. The…
2. Older backwash valve stems were not a single molded part. They were one piece of stainless steel with a metal washer, retaining washer and E-clips to hold the O-rings together.
1
of 7
1. Try to find out the year the filter was manufactured before y…
1. Try to find out the year the filter was manufactured before you start, so that you have the proper model of replacement valve on hand. If it was before 1980, the filter will have a brass rotor and port seals. If it was made in 1980-81, it will have a Noryl rotor with a straight seal. Anything after 1982 will have a Noryl rotor and a tapered seal. Bring parts for all three rotor valve types with you.
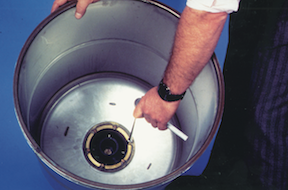
2. Backwash the filter. Remove the grids and manifold. At the bo…
2. Backwash the filter. Remove the grids and manifold. At the bottom of the filter are six cap screws and the compression ring that holds the filter tank to the backwash valve. Use a ratchet wrench with a 7/16-inch socket and a 36-inch extension to remove the cap screws. That done, the filter tank will lift off.
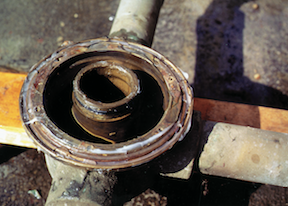
3. Remove the filter tank to reveal the rotor valve. (Before rem…
3. Remove the filter tank to reveal the rotor valve. (Before removing the rotor, be sure to remove the brass extension handle from the bottom of the valve body.)
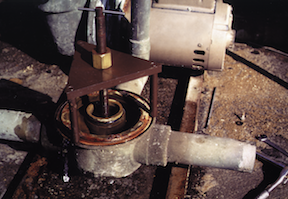
4. Using a rotor puller, remove the rotor from the valve body.
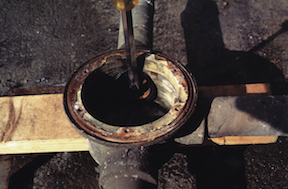
5. On the old-style valves, push down and pry out the old port s…
5. On the old-style valves, push down and pry out the old port seals with the blade of a screwdriver. Apply even pressure — do not force the port seal with a hammer because this could damage the body and cause it to leak. Be sure to remove the small stem O-ring in the bottom of the valve body. Place some small wooden blocks underneath the valve body to support it. Once removed, use sand cloth to clean the rotor as well as the brass valve body. Be sure to thoroughly clean the groove on top of the valve body because most leaks will occur here.
6. You will now need a new set of brass port seals, valve body O…
6. You will now need a new set of brass port seals, valve body O-ring, stem O-ring and the manifold O-ring to finish the job.
7. The new-style built-in valves don’t have port seals built i…
7. The new-style built-in valves don’t have port seals built into the valve body. They use a Noryl rotor with a one-piece seal around it. Use the same procedure to remove the filter tank and gain access to the valve. Remove the old seal, clean the Noryl rotor by removing old lubricant, DE and other debris, and clean the brass valve body the same as above. Install the seal by pulling it over the top of the rotor, lining the seal up in the groove. Use needle-nose pliers to gently pull the tabs through the hole in the rotor.
Be prepared
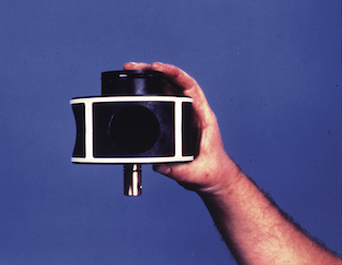
Most backwash valves are not very difficult to repair once you have done it once or twice. However, if you don’t have the right parts with you when the time comes, it can result in a frustrating, time-consuming trip back to the office. Many service techs carry an O-ring kit in the truck with them at all times.
An O-ring kit is a small storage box or fishing tackle box with compartments. It contains a collection of various-size O-rings and other small parts. Label each compartment with the brand, style and part number for the O-rings it will hold. The O-ring kit shown here contains parts for all major brands of push-pull valves.
Author: Robert H. Foutz Jr. is owner of Purity Pool Service in Huntington Beach, Calif.